


×
Login Form
×
Registration
Profile Information
Login Details
or login
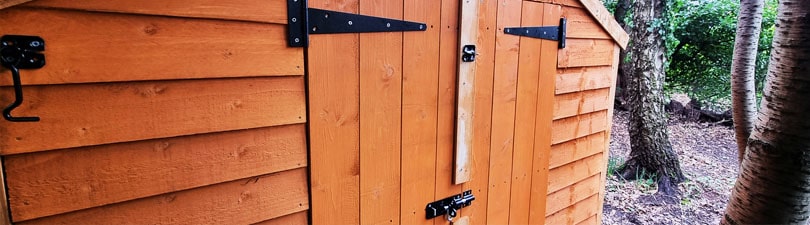
Painting Your Garden Fence & Gate
30.08.17
Posted By Handle King Ireland

With summer in full bloom, it is the perfect time to carry out maintenance works on your garden in preparation for the colder months ahead, to ensure that the wood panels are not directly exposed damage from the elements. Here are our 5 top tips on how to paint your garden fence to achieve a professional finish and ensure your boundaries stand the test of time!
 Check the Weather Forecast
It may be obvious, but you will need a couple of dry days in order to complete painting your fences, so remember to check the weather forecast prior to commencing work!
 Prepare the Surface
It is important to first remove any loose debris from the surface of the fence using a firm bristle brush followed by sandpaper to create a smooth and even surface on which to paint.
 Clean Your Fence
Once you have completed your initial preparations, it is time to wash the surface of the fence with soapy water to remove any stubborn areas of dirt which may have become ingrained into the fence, before rinsing clean with fresh water and leaving the fence panels to dry thoroughly. If possible it is best to use a jet wash when rinsing the panels, to ensure any dirt or soapy residue is fully removed and does not dry back onto your fence!
 Mask Your Gate Furniture
Were possible it is best to remove or mask your gate furniture and cover the ground with a dust sheet prior to painting, to achieve a neat overall finish and ensure that your ironmongery and flora aren’t painted in the process!
 Now Your Ready to Paint
Once you have removed your hardware and checked that your fence panels are completely dry, you are ready to paint! Remember to allow enough time for the paint to dry fully in between coats and before refitting your ironmongery.
For more DIY tips, check out our previous blogs on Painting Internal Doors and How to Paint Interior Walls.

